Wednesday, December 25, 2024
Home Blog Page 22

Miniprep low copy plasmids-PDF

Purpose

When sequencing miniprepped DNA of low copy plasmids, I see a pretty high sequence failure rate despite my submitting what I think is sufficient amounts of DNA (based on Nanodrop readings and confirmed by gel electrophoresis).

Based on conversations with Tom, here is a revised miniprep protocol designed to both increase yields and reduce potential contaminants in the resulting DNA sample. I’ve only tried this once, but my yields were at least 50% higher. (i.e. Rather than 20-40 ng/μL yield, I got 50-60 ng/μL yield.

  • After submitting some of this miniprepped DNA for sequencing (~250-300ng in 12 μL), I got some sequence data back (as opposed to the failures I was seeing before) but the runs were short. I did not get the 800 bp read that you frequently see … rather more like 200-500 bp. I am not sure if there are contaminants present or if I need to submit more DNA.

Materials

  • Qiagen Spin Miniprep Kit
  • 10-12 mL of Escherichia coli culture to be miniprepped

Protocol

Note: All protocol steps should be carried out at room temperature.

  1. Pellet bacterial cells.
  2. Resuspend pelleted bacterial cells in 250 μL Buffer P1 (kept at 4 °C) and transfer to a microcentrifuge tube.
    • Ensure that RNase A has been added to Buffer P1. No cell clumps should be visible after resuspension of the pellet.
  3. Add 250 μL Buffer P2 and gently invert the tube 4–6 times to mix.
    • Mix gently by inverting the tube. Do not vortex, as this will result in shearing of genomic DNA. If necessary, continue inverting the tube until the solution becomes viscous and slightly clear. Do not allow the lysis reaction to proceed for more than 5 min.
  4. Add 350 μl Buffer N3 and invert the tube immediately but gently 4–6 times.
    • To avoid localized precipitation, mix the solution gently but thoroughly, immediately after addition of Buffer N3. The solution should become cloudy.
  5. Centrifuge for 10 min at 13,000 rpm (~17,900 x g) in a table-top microcentrifuge.
    • A compact white pellet will form.
  6. Apply 800 μL supernatant from step 5 to the QIAprep spin column by pipetting.
  7. Centrifuge at 13,000 rpm (~17,900 x g) in a table-top microcentrifuge for 60 s.
  8. Decant the flow through into the column for a second spin through.
  9. Centrifuge at 13,000 rpm (~17,900 x g) in a table-top microcentrifuge for 60 s.
  10. Discard the flow through.
  11. Apply the remaining supernatant from step 5 (usually about 200 μL) to the QIAprep spin column by pipetting.
  12. Centrifuge at 13,000 rpm (~17,900 x g) in a table-top microcentrifuge for 60 s.
  13. Decant the flow through into the column for a second spin through.
  14. Centrifuge at 13,000 rpm (~17,900 x g) in a table-top microcentrifuge for 60 s.
  15. Discard the flow through.
  16. Wash the QIAprep spin column by adding 0.5 ml Buffer PB.
  17. Centrifuge at 13,000 rpm (~17,900 x g) in a table-top microcentrifuge for 60 s.
  18. Discard the flow through.
  19. Heat the elution buffer (either water or buffer EB) to 55°C.
  20. Wash QIAprep spin column by adding 500 μL Buffer PE.
  21. Centrifuge at 13,000 rpm (~17,900 x g) in a table-top microcentrifuge for 60 s.
  22. Discard the flow through.
  23. Wash QIAprep spin column a second time by adding 500 μL Buffer PE.
    • This can help to reduce residual salts from Buffer PB.
  24. Centrifuge at 13,000 rpm (~17,900 x g) in a table-top microcentrifuge for 60 s.
  25. Discard the flow through.
  26. Centrifuge at 13,000 rpm (~17,900 x g) in a table-top microcentrifuge for 60 s.
    • IMPORTANT: This spin step is necessary to get rid of any residual ethanol from Buffer PE. Residual wash buffer will not be completely removed unless the flow-through is discarded before this additional centrifugation. Residual ethanol from Buffer PE may inhibit subsequent enzymatic reactions.
  27. Place the QIAprep column in a clean 1.5 ml microcentrifuge tube.
  28. Add 20 μL of heated elution buffer (buffer EB) to center of column.
  29. Let stand 1 min.
  30. Centrifuge at 13,000 rpm (~17,900 x g) in a table-top microcentrifuge for 60 s.
  31. Add 10 μL of heated elution buffer (buffer EB) to center of column.
  32. Let stand 1 min.
  33. Centrifuge at 13,000 rpm (~17,900 x g) in a table-top microcentrifuge for 60 s.

Beta-galactosidase assay/96 well format-PDF

Materials

  • 96 deep well plates for growing cultures
    • Square wells aerate the cultures better
  • 96 well plates for the assay itself
    • Kevin Griffith uses Marsh brand (MP-9091) 96 well plates available through ThermoFisher Scientific (but not available on the website). This plate is a polystyrene plate that has a max well volume of 0.3ml. The wells are a flat bottom design. These plates are not coated or treated. The MP-9091 is packaged as 100 plates per case.
  • 500mM dibasic sodium phosphate (Na2HPO4)
    • 1M Na2HPO4 seems to come out of solution in my hands.
  • 4M potassium chloride (KCl)
  • 1M magnesium sulfate (MgSO4)
  • 1% hexadecyltrimethylammonium bromide (CTAB)
  • 1% sodium deoxycholate (light-sensitive, stored at 4°C)
    • 10% seems to go funky over time
  • 1M NaH2PO4
  • o-nitrophenyl-β-D-Galactoside ONPG (solid)

Permeabilization Solution

For 8mL:

  • 1.6 mL 500 mM Na2HPO4
  • 40 μL 4M KCl
  • 16 μL 1M MgSO4
  • 480 μL 1% CTAB
  • 320 μL 1% sodium deoxycholate
  • 43.2 μL TCEP (it is a more stable reducing agent than β-mercaptoethanol)

H2O to 8mL (You need 80 μL per sample. This is enough for a 96 well plate.)

Substrate solution

For 15mL

  • 1.8mL 500mM Na2HPO4
  • 600μL 1M NaH2PO4
  • 15 mg ONPG
  • 40.5 μL TCEP (more stable reducing agent than β-mercaptoethanol)

(You need 150 μL per sample. This is enough for a 96 well plate.)

Protocol

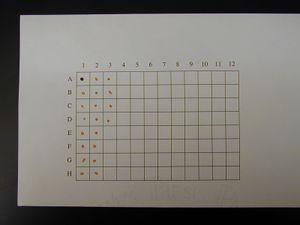
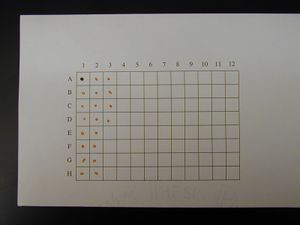
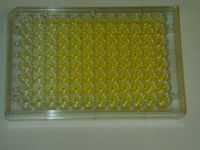
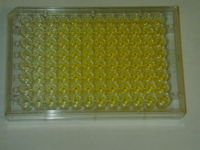
96 well plate after completion of this assay.

  1. Grow cultures in tubes under whatever conditions you wish to test.
    • 96 well plates did not give me as good of growth as tubes.
    • If growing in 96 well plates, use incubator in 32-322 because plate shaker in 32-314 doesn’t hold the right temperature.
  2. During growth
    1. Make permeabilization solution.
    2. Pre-measure 80 μL aliquots of permeabilization solution into a 96 well microplate and cover to reduce evaporation (permeabilization plate).
  3. Aliquot cultures into a 96 well microplate (175 μL per well).
  4. Measure Abs600 of cultures using plate reader (absorbance plate).
  5. Remove a 20 μL aliquot of each well of the absorbance plate and add it to the corresponding well of the permeabilization plate.
    • The sample is now stable for several hours. This allows you to perform time-course experiments.
    • Also include a blank (solutions-only) sample for subtracting the background absorbance later.
  6. Once the time course is nearly complete, make substrate solution.
  7. Add 150 μL substrate solution to each well of measurement plate.
  8. Add 25 μl of permeabilized samples to measurement plate.
  9. Place the plate in the plate reader to measure the A420 over 60-90 mins.
    • The plate reader does not actually have a 420 excitation filter. So you must use the CFP 430 excitation filter.

Controls

  1. Compare measured beta-galactosidase activity in plate reader versus that in microfuge tubes to ensure that the plate is not impacting measured β-galactosidase activity.

Standard curves

  1. Make a standard curve in the plate reader of A420 vs o-nitrophenol concentration using a two-fold serial dilution of ONP.
  2. Make a standard curve in the plate reader of change in A420 versus time as a function of β-galactosidase concentration.

References

  1. Griffith KL and Wolf RE Jr. Measuring beta-galactosidase activity in bacteria: cell growth, permeabilization, and enzyme assays in 96-well arrays. Biochem Biophys Res Commun. 2002 Jan 11;290(1):397-402. DOI:10.1006/bbrc.2001.6152 | PubMed ID:11779182 | HubMed [Griffith-2002]
    96 well format
  2. Zhang X and Bremer H. Control of the Escherichia coli rrnB P1 promoter strength by ppGpp. J Biol Chem. 1995 May 12;270(19):11181-9. DOI:10.1074/jbc.270.19.11181 | PubMed ID:7538113 | HubMed [Zhang-JBC-1995]
    (from which this assay was derived)
  3. ISBN:0879691069 [Miller-1972]
    (original Miller assay)
  4. ISBN:0879693495 [Miller-1992]
  5. Promega β-galactosidase assays (96 well format and standard curves)[Promega]
  6. Invitrogen β-galactosidase assays (96 well format)[Invitrogen]
  7. Thibodeau SA, Fang R, and Joung JK. High-throughput beta-galactosidase assay for bacterial cell-based reporter systems. Biotechniques. 2004 Mar;36(3):410-5. DOI:10.2144/04363BM07 | PubMed ID:15038156 | HubMed [Thibodeau-Biotechniques-2004]

All Medline abstracts: PubMed | HubMed

Beta-galactosidase assay-PDF

Materials

  • 500mM dibasic sodium phosphate (Na2HPO4)
    • 1M Na2HPO4 seems to come out of solution in my hands.
  • 4M potassium chloride (KCl)
  • 1M magnesium sulfate (MgSO4)
  • 1% hexadecyltrimethylammonium bromide (CTAB)
  • 1% sodium deoxcholate (light-sensitive, stored at 4°C)
    • I used to use 10% but the stock solution seemed to go funky over time.
  • 1M NaH2PO4
  • o-nitrophenyl-β-D-Galactoside ONPG (solid)
  • 1M sodium carbonate (Na2CO3)

Permeabilization Solution

For 2mL:

  • 400 μL 500 mM Na2HPO4
  • 10μL 4M KCl
  • 4μL 1M MgSO4
  • 160μL 1% CTAB
  • 80μL 1% sodium deoxycholate
  • 10.8 μL beta-mercaptoethanol

(You need 80 μL per sample.)

Substrate solution

For 10mL

  • 1.2mL 500mM Na2HPO4
  • 400μL 1M NaH2PO4
  • 10 mg ONPG
  • 27 μL β-mercaptoethanol

(You need 600 μL per sample.)

Protocol

  1. Grow cultures under whatever conditions you wish to test.
  2. During growth
    1. Make permeabilization solution.
    2. Pre-measure 80 μL aliquots of permeabilization solution into 1.5 mL microfuge tubes and close them.
  3. Measure Abs600 of cultures and RECORD IT!
  4. Remove a 20 μL aliquot of the culture and add it to the 80 μL of permeabilization solution.
    • The sample is now stable for several hours. This allows you to perform time-course experiments.
    • Also include a blank (solutions-only) sample for zero’ing the spec later.
  5. Make substrate solution.
  6. Warm samples and substrate solution to 30°C
  7. Start timer counting up.
  8. Every 15 secs, add 600 μL of substrate solution to a sample tube.
  9. Note the time of addition.
  10. After sufficient color has developed, add 700 μL of 1M Na2CO3, mix well.
  11. Note the stop time.
  12. Once all reactions are complete, transfer the tubes to a microfuge and spin for 10 minutes at full speed.
  13. Gently remove tubes from centrifuge.
  14. Measure the absorbance at 420nm and 550nm. (Use UV-Vis protocol on Nanodrop).

Calculate Miller Units as:

[math]\displaystyle{ 1000 * \frac{(Abs_{420})}{((Abs_{600} \text{ of culture sampled})*(\text{volume } [0.02 \text{ mL}])*(\text{reaction time}))} }[/math]

or

[math]\displaystyle{ 1000 * \frac{(Abs_{420} – 1.75*Abs_{550})}{((Abs_{600} \text{ of culture sampled})*(\text{volume } [0.02 \text{ mL}])*(\text{reaction time}))} }[/math]

where:

  • Abs420 is the absorbance of the yellow o-nitrophenol,
  • Abs550 is the scatter from cell debris, which, when multiplied by 1.75 approximates the scatter observed at 420nm,
  • t = reaction time in minutes,
  • v = volume of culture assayed in milliliters,
  • Abs600† reflects cell density.

References

  1. ISBN:0879693495 [Miller-1992]
  2. Zhang X and Bremer H. Control of the Escherichia coli rrnB P1 promoter strength by ppGpp. J Biol Chem. 1995 May 12;270(19):11181-9. DOI:10.1074/jbc.270.19.11181 | PubMed ID:7538113 | HubMed [Zhang-JBC-1995]
    (from which this assay was derived)
  3. ISBN:0879691069 [Miller-1972]
    (original Miller assay)

Preparing stabs-PDF

For long term storage of bacterial strains. Useful for shipping strains.

Materials

  • Stab agar
    • 10 g nutrient broth
    • 5 g NaCl
    • 6 g agar
    • 10 mg cysteineË™Cl
    • 10 mg thymine
    • H2O to 1 L

Autoclave to sterilize.

Procedure

  1. Fill airtight, autoclavable vials with rubber or teflon caps 2/3 full of stab agar
  2. Inoculate with a single colony repeatedly poking the inoculating loop into the agar
  3. Incubate at 37°C for 8-12 hrs until cloudy tracks of bacteria become visible
  4. Seal tightly and store in the dark at room temperature (15-22°C)
  5. Revive by using inoculating loop to streak onto a new LB plate

LIC Cloning-PDF

Overview

Clone genes into pEU-E01-LIC1 protein expression vector using ligation-independent cloning (LIC).

Materials

List reagents, supplies, and equipment necessary to perform the protocol here. For those materials which have their own OWW pages, link to that page. Alternatively, links to the suppliers’ page on that material are also appropriate.

  • supply 1 (i.e. tubes of a certain size? or spreaders?)
  • reagent 1
  • X μL reagent 2
    • component A (reagent 2 is made up of multiple components)
    • component B
  • equipment 1
  • equipment 2

Procedure

  1. Step 1
  2. Step 2
    • Step 2 has some additional information that goes with it. i.e. Keep at 4°C.
  3. Step 3
    1. Step 3 has multiple sub-steps within it.
    2. Enumerate each of those.

Notes

Please feel free to post comments, questions, or improvements to this protocol. Happy to have your input!

  1. List troubleshooting tips here.
  2. You can also link to FAQs/tips provided by other sources such as the manufacturer or other websites.
  3. Anecdotal observations that might be of use to others can also be posted here.

Please sign your name to your note by adding ”’*~~~~”’: to the beginning of your tip.

References

Relevant papers and books

  1. Bardóczy V, Géczi V, Sawasaki T, Endo Y, and Mészáros T. A set of ligation-independent in vitro translation vectors for eukaryotic protein production. BMC Biotechnol. 2008 Mar 27;8:32. DOI:10.1186/1472-6750-8-32 | PubMed ID:18371187 | HubMed [Bardoczy-BMCBiotechnol-2008]


Agarose Slides for Imaging-PDF

Overview

This protocol allows live bacterial cell imaging. We create a small, nutrient rich gel pad and inject the bacteria on top.

Materials

  • 500mg Agarose
  • 100 ml PBS buffer/bacterial media
  • 2 Glass microscope slides
  • 4 Glass cover slips
  • Nail Polish
  • Bacterial liquid culture (at least 10 μl, ideally in exponential phase)

Procedure

  1. Mix Agarose with buffer solution, microwave until boiling.
  2. Prepare one glass slide and position 2 thin cover slips on each end, to create 2 edges.
  3. Pipet 25 μl of the Agarose solution onto the middle of the glass slide, while making sure not to touch the coverslips.
    1. Quickly position the second glass slide on top of the molten gel drop.
    2. Leave to dry for a few minutes.
  4. Remove the top glass slide.
  5. Add 2-4 μl of the liquid culture onto the hardened gel drop.
    1. Leave to dry for a couple of minutes
  6. Add a cover slip on top, seal with nail polish at all 4 corners.
  7. You are now ready to image some cells!


Preparing electrocompetent cells-PDF

Procedure

Liquid Nitrogen must be purchased from the Chemistry-Stockroom by 11:30AM.

Day 1

1. Autoclave the following

9x125ml flasks containing 50 mL LB Lennox or SOB
400 mL Millipore Water
100 mL 10% glycerol

2. While the flasks are still hot, combine the media flasks until you have four flasks containing 100ml and one flask containing 50ml.

3. Place the following in the refrigerator overnight:

Autoclaved water
Autoclaved Glycerol solution

4. Inoculate the 5OmL flask with NEB5 (DH5alpha) cells and grow overnight at 37°C and 240RPM.

Day 2

1. Fast cool the centrifuge with the correct rotor to 4°C.

2. Add the 5mL of the overnight culture to each (there are 4) flask containing 100ml of LB medium and incubate at 37°C with vigorous shaking until the OD 600nm is between 0.5 and 1.0. (approximately 3 hours)

3. Pour the log phase culture into eight 50 mL centrifuge tubes.

4. Place the tubes on ice for 30 minutes.

For the following steps it is important to keep cells ice-cold. You will also have to alternate the tubes because the centrifuge can only hold 4 tubes at a time. A diagram on how to do this can be found to the right


5. Centrifuge for 15 mins at 2000g (3500 RPM) at 4°C.

6. Remove supernatant and gently resuspend pellets with 30ml ice-cold sterile water.

7. Centrifuge for 15 mins at 2000g (3500 RPM) at 4°C.

8. Remove supernatant and gently resuspend pellets in 30ml ice-cold sterile water.

9. Centrifuge for 15 mins at 2000g (3500 RPM) at 4°C.

10. Remove supernatant and gently resuspend pellets in 10ml cold 10% glycerol.

11. Transfer to 15 mL centrifuge tubes and hold on ice for 30 minutes.

12. Change the rotor inserts in the centrifuge to accomodate the 15ml tubes.

12. Centrifuge for 15 mins at 2000g (3500 RPM) at 4°C.

13. Remove the supernatant and add 500 μl of 10% glycerol.

14. Pipet 100μl aliquots into micro-centrifuge tubes (on ice!!!).

15. Shock freeze cell suspensions using liquid nitrogen and store at -80°C.

Notes

  • The Ice-cold thing is really important
  • It is usually helpfull to have two people for the last steps of this protocol, that way one person can pipet 100μL of cell suspension into a tube, and the other person can dip the tube in liquid nitrogen. This saves you from having to keep all those little micro-centrifuge tubes on ice (Which is a real pain in the ass)


DNA Miniprep with Alkaline Lysis-PDF

Overview

Miniprep DNA from E. Coli

Materials

  • STE
Stock From Stock(for 50ml) Final
1M Tris(pH8) 0.5ml 10mM
5M NaCl 1ml 100mM
0.5M EDTA 0.1ml 1mM


  • ALKALINE LYSIS 1
Stock From Stock(for 50ml) Final
1M Tris(pH8) 1ml 20mM
Glucose FW:108.2 0.45g 50mM
0.5M EDTA 0.1ml 10mM


  • ALKALINE LYSIS 2
Stock From Stock(for 10ml) Final
5N NaOH 0.4ml 0.2N
10% SDS 1ml 1%
dH2O up to 10ml


  • ALKALINE LYSIS 3
Stock From Stock(for 50ml) Final
5M KAc 30ml 3M
Glacial ac ac 5.75ml 5M acetate
dH2O up to 50ml

Procedure

Isolation of Mononuclear Cells

  1. o/n grow single colony in 2ml of LB (+ antibiotics)
  2. 1.5 ml into eppendorf.
  3. Pellet cells at max speed in a cold room for 1.5 min.
  4. Discard supernatant, and leave pellet as dry as possible.
  5. Resuspend pellet in 100 μL Alkaline Lysis SLN1, vortex.
  6. Add 200μL freshly prepared AL2, mix by inverting 5-6 times(DO NOT vortex!)
  7. Put on ice.
  8. Add 300μL AL3,invert tubes to mix.
  9. Incubate on ice for 5 min.
  10. Centrifuge at max speed for 5 min in a cold room.
  11. Take the supernatant into a new tube.
  12. Add 900 isopropanol at RT. Vortex
  13. Centrifuge at max speed for 10 min at RT.
  14. Rinse the pellet with 1ml 70%EtOH.
  15. Centrifuge at max speed for 5 min at RT.
  16. Air dry the pellet.
  17. Dissolve each in 50μL TE OR H2O.

Notes

  1. Store solutions at 4 degrees and each time freshly prepare the Buffer 2.

References

  1. Please refer to Maniatis’ Molecular Cloning: A Laboratory Manual for further information


Rapid bacterial DNA prep-PDF

Low-yield DNA is suitable for PCR.

Materials

  • Sterile needles or toothpicks
  • Sterile microtubes
  • Lysis buffer (in ddH2O): 0.25% (w/v) SDS, 50 mM NaOH; do not autoclave, but store as frozen aliquots for long-term storage (>2 weeks).
  • Heat block at 95 ºC or boiling water bath (~100 ºC)
  • Autoclaved ddH2O or other molecular biology-grade water

Procedure

  1. Using a sterile toothpick or needle, pick a small amount of bacteria from a colony and deposit it in 20 µl of lysis buffer in a 1.5 ml microtube. The amount of bacteria should be a glob of about 1 mm in diameter. Tap the tube gently to suspend the bacteria evenly.
  2. Heat at 95 ºC for 15 min, or boil for 5 min. Centrifuge briefly to collect the liquid to the bottom of the tube.
  3. Add 180 µl of sterile ddH2O and mix.
  4. Centrifuge again at high speed in a microfuge (14000 – 16000 x g) for 5 min.
  5. Transfer 50 µl of the supernatant to a new tube, store frozen. Use 1 – 2 µl of this template per 50 µl PCR reaction.


Lactobacillus culture-PDF

Overview

General overview and guidelines on how to grow up a culture of Lactobacillus

Materials

  • MRS broth (disco)
  • MRS agar (disco)
  • anaerobic conditions

Procedure

  1. Follow instructions to make MRS plates and media, autoclave to sterilize
  2. Streak Lactobacillus on MRS plate or inoculate into a test tube of MRS media
  3. Incubate at 37C under anaerobic conditions
  4. If from a new source of Lactobacillus (ex. dehydrated bacteria from ATCC) allow up to 3 days to grow. Otherwise, allow 12-24 hours to grow