Thursday, April 3, 2025
Home Blog Page 5

Templiphi-PDF

Use this if you want amplify a plasmid that cannot be induced. Can be used to amplify most kinds of circular DNA. The kit is intended to amplify circular DNA prior to sequencing but we won’t normally be doing that. The starting point for the protocol described below assumes you are starting from a streaked plate. The manual describes the process for other starting points also.

Concept

We begin by denaturing the DNA. We add random primers to this mix, as it cools, the primers can hybridize to the ssDNA. Polymerase is then added to the mixture. It can “roll” around the plasmid many times, starting from everywhere a primer has bound. This leads to massive amplification of the plasmid. The end result is a branched mess of DNA where the plasmid is now in linear form, with many copies concatenated together. A restriction digest can be used to chop up the mix into individual copies of our original plasmid.

Materials

  1. A colony of cells containing your circular DNA of choice
  2. Templiphi manual – find this on the side of the refrigerator named – “Marilla”
  3. The Templiphi reagents – find these in the SMUG section of the –80C. They are kept in a small box labeled, surprisingly, Templiphi reagents.
  4. One sterile toothpick for each plasmid you want to use.
  5. Some small PCR tubes.
  6. Ice box to keep Templiphi reagents as cold as possible for as long as possible.

Method

Steps 1-8 can be done in about an hour. The protocol normally requires an overnight step and about 20 mins of work the next morning. At a squeeze, you could get it all done in a day if you have to (shorten the incubation step to 5-6 hours).

  1. Take part of one colony using the toothpick. It’s important that you get as little as possible in order to get the greatest amplification in the end, non-intuitive. Basically, if you have too much of your sample, it will compete with the enzymes you’ll use and you’ll get a lower yield.
  2. Add this part of a colony to 100uL of water in a PCR tube and mix gently with the toothpick.
  3. Do a serial dilution by adding 1uL from this mixture to 4uL of water in a second PCR tube. Add one 1uL of this mixture to another PCR tube containing 4uL of water. I’ll confirm the success of these dilution levels later.
  4. Add 5uL of sample buffer (white cap) to each of the above PCR tubes (we’ll do the experiment at three different dilutions to make sure we get one that works well). You will have to thaw the buffer.
  5. Heat these samples at 95C for 3mins. This denatures the DNA.
  6. Add one 5uL aliquot of reaction buffer (blue cap) to a master mix in a PCR tube for each sample PCR tube you have. Add 0.2uL of enzyme mix to the master mix. You need to use this the same day you make it.
  7. Add 5uL of this mix to each of the sample PCR tubes once they have cooled down.
  8. Put the (labeled) PCR tubes in the 30C room overnight.
  9. To finish the reaction you need to inactivate the enzymes – heat the PCR tubes at 65C for ten minutes.
  10. Allow them to cool to 4C and store as you would the results of a mini-prep.
  11. If you are following the manual protocol, you can ignore the steps referring to cycle sequencing.

Isolate leydig cells from testes-PDF

leydig cell from testes

I) Removal of testes: Put into ice-chilled D-PBS.

II) Cannulation: Perfuse 0.5 ml DB (1 mg per ml collagenase + one 1 ml aliquot of 2.4 U/ml dispase, final conc. = 0.185 U/ml in 13 ml) into testicular artery of each testis. Preparation of internal collagenase: 12 mg of collagenase + one 1 ml aliquot dispase + 12 ml of DB.

III) Put each perfused testis into beaker containing fresh, chilled Dulbecco’s PBS (D-PBS).

IV) Decapsulation: Remove the tunica of each testis. Place 2 testes into a 50 ml centrifuge tube containing 5 ml DB. Repeat for remaining 5 pairs of testes.

V) Dissocation: Add 5 ml external collagenase in to each testis containing tube (results in 0.25 mg/ml collagenase). Shake @ 70 to 80 cycles per minute @ 34_ C for 10 to 20 minutes (monitor). Preparation of external collagenase: 16 mg of collagenase + 32 ml of DB + one 0.42 mg aliquot of DNase (Roche, # 104 159) + one 1ml aliquot dispase.

VI) Centifugation: Bring volume of each tube up to 50 ml with SB. Recap tube and invert the tube several times. Let the Seminferious tubules settle for 1 to 2 minutes. With a 10 or 25 ml pipette, draw up the supernate, without disturbing the pellet. Save the supernate. Once the supernate has been collected, refill the tube containing the tubules with SD again invert the tube, then allow the tubules to settle, and collect the supernate. Repeat 3 to 4 more times. Spin down the tubes (Falcon 225ml tubes; Falcon# 352075) at 800xg for 20 minutes. Keep the pellets.

VII) Percoll density gradient centrifugation: 8 ml 10X HBSS + 88 ml Percoll (= stock isotonic Percoll, SIP). 96 ml SIP + 80 ml PB = 175 ml of 55% pH 7.4 SIP [this is enough SIP for one tube]. To this tube (Nalgene 175ml conical PC centrifugation bottle # 3144-0175) add five aliquot of DNase along will the cell pellets. To the dummy tube (175 ml of 55% pH 7.4 SIP) pipet 25 ul’s each of density marker beads (DMB) 3, 4, & 5 [since Percoll is expensive you can save the dummy tube or forgo it]. Balance the tubes and, using a Beckman JA-10 rotor (use adapters and cushions), spin @ 10,000 RPM (approx. 17,690 x g) for 40 minutes at 4_ C. Pipet off the upper layer of the gradient carefully, from the meniscus to DMB 4, discard this layer. Pipet off the upper layer from DMB 4 to the midpoint between DMB’s 4 & 5, discard this layer. Collect the fraction from the midpoint to the bottom of the gradient with a pipet carefully avoiding the red blood cell clumps. Fill both tubes (225ml Falcon) with PB to dilute out the Percoll and centrifuge @ 800xg for 20 minutes. Keep the cell pellet.

VIII) BSA Multi-Gradient centrifugation: Carefully and slowly layer 50 ml of 5% BSA –PB (made by mixing 25 ml 10% BSA-PB + 25 ml 0% BSA-PB) on top of 65 ml of 10% BSA-PB. Then layer 50 ml of 2.5% BSA–PB (made by mixing 12.5 ml 10% BSA-PB + 37.5 ml 0% BSA-PB) on top of the 5% BSA-PB layer. Finally layer 10 ml of 1% BSA-PB/Cell mixture on top of the 2.5% BSA-PB layer (1% BSA-PB/Cell mixture made by mixing the cell pellets with 1 ml 10% BSA-PB + 9 ml 0% BSA-PB). Spin down the tubes (Falcon 225ml tubes; Falcon# 352075) at 50xg (550 rpm) for 10 minutes. Collect the bottom 50 ml, fill up the 225 ml tube with 0% BSA-PB to dilute out the high % of BSA and centrifuge @ 200xg for 15 minutes. Keep the cell pellet.

IX) Final pellet: Resuspend the final pellet in 2-4 ml of DB or LCM. Perform a hemocytometer count (the total number of cells falling within the boundaries of 5 squares on a Neubauer hemocytometer X .05 = the number of cells in millions per ml) to obtain yield.

Rapid plant gDNA extraction-PDF

Abstract

This protocol was developed to rapidly obtain genomic DNA from both Arabidopsis thaliana and Medicago truncatula for use in PCR-based analysis. This method has been used to screen large numbers of transgenic plants to confirm the presence of a T-DNA and could be applied to any PCR-based screening. Please note that the results are reproducible for most of the plants investigated however plants with softer leaves seem to give the best results.

Materials

-Non-absorbent disposable sheet –Parafilm is recommended.

-Pestle with a flat base –A 50ml falcon tube works.

-Absorbent paper –Whatman filters recommended.

-Hole punch –Kai biopsy punch (3mm) gave good results.

-Gloves and forceps

Method

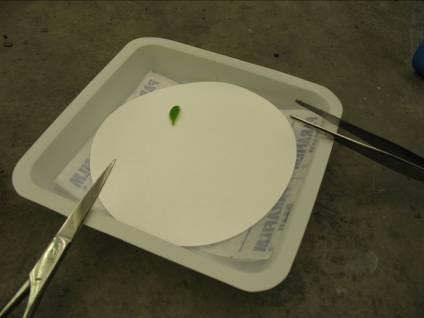
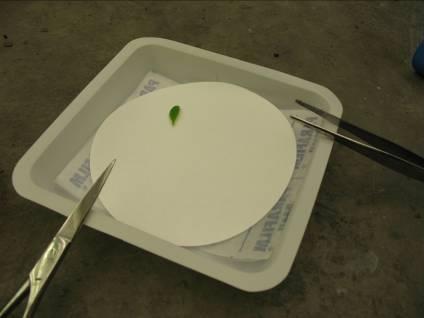
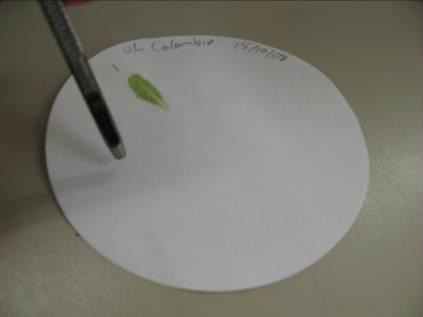
1 – Place parafilm onto a clean surface and a filter paper onto the parafilm. Snip off a piece of tissue and place onto the filter paper.


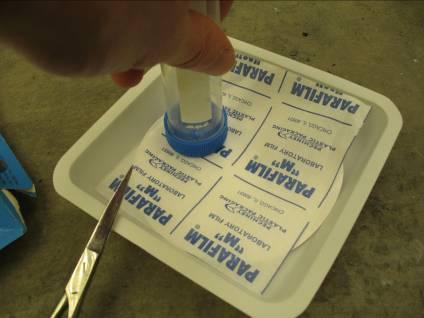
2 – Place a second sheet of parafilm over the tissue and apply pressure.


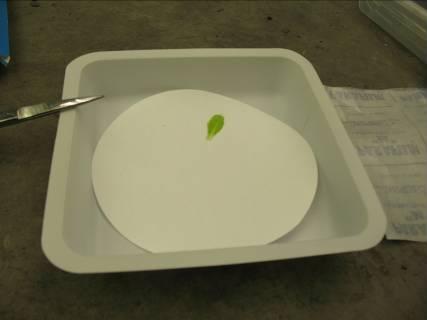
3 – Remove the film and the plant material and you should get a nice ‘juicy’ impression of the crushed tissue. Leave this to dry at room temperature, it often takes an hour or so for larger leaves.


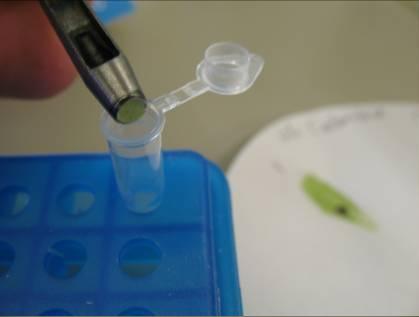
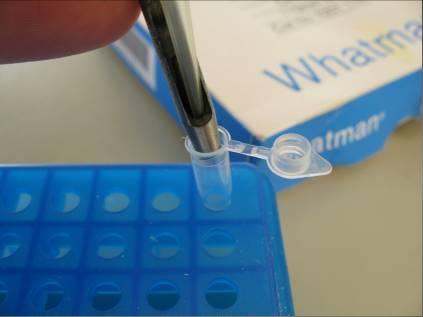
4 – Once dry the filter can be hole punched and the disks dropped straight into a PCR mix. Be aware the paper will soak some of the PCR so small volume reactions (20 μl) may have issues depending on your disk size. Each impression can give several punched holes so repeats can be easily performed. The filter papers will be good to use for several months, I have some which are >1 year and still gave the expected product.

Care should be taken at all times to ensure that cross contamination from unwashed punches, disks touching or the punch block should be avoided. I havn’t yet had a primer or primer set that have amplified anything from the paper alone, it is important to check this every time as it may happen.


Background thinking

Although not necessary for a protocol to work it is often useful to know the thinking behind the method development, this may help a user tailor the method to sightly different approach or aid trouble shooting.

After watching too much CSI I saw that gDNA was surprisingly stable at room temperature and could be isolated from an array of juices using cotton buds etc. I had many hundred transgenic lines to PCR screen to confirm the insertion of a T-DNA (this also allowed confirmation that labels hadn’t been mixed or seed spilt etc.) The direct addition of crushed material to a taq PCR would often give a result but it wasn’t giving repeatable clean products, also it meant material would need to be stored at -80°C if I wanted to repeat a sample. The common opinion was that cytosolic components had a negative affect on the PCR so I tried various methods of absorbing plant juice, I hoped that by tangling the DNA/protein/sugar mix in the fibres of paper would in effect separate them, then the polymerases would have a better shot at running along the relatively short length being amplified. For Arabidopsis thaliana and Medicago truncatula the filter paper worked well, for more crunchy leaves from plants such as Ricinus communis I could get a green juice out but not much luck with PCR products, it could be the more robust leaf architecture prevented genomic DNA leaking out as well or it could have been inhibitory factors.

Assembly pcr-PDF

Introduction

Assembly PCR can be used to assemble two gene-sized pieces of DNA into one piece for easier cloning of fusion genes/parts. Briefly, it essentially involves PCR’ing the two pieces separately with primers that have a 20bp overlap and then doing an extra PCR step using the two products as the template. This is essentially just for ease of cloning. Instead of trying to PCR or cut out of a vector two separate pieces and then assemble them by endonuclease digestion and ligation (aka 3-way ligation), it can be easier simply to PCR the first piece w/ a reverse primer that overlaps with the forward primer of the second piece, and then use the product of the first PCR reactions as a template for the assembly reaction. If the reverse primer for the 5′ piece and the forward primer for the 3′ piece overlap by ~20bp, the product of the first PCR reactions should anneal in the overlapping region and create a full length (gene fusion) product. Using the forward primer for the first piece and the reverse primer for the second piece in the assembly reaction then amplifies the desired full-length product. The merits for this technique are that it’s arguably faster than standard 3-way ligation assembly (because you need good-quality DNA to make that work well, which usually means sub-cloning each piece, in my experience), and it’s more reliable (the quality of the product is very good so you can clone it directly into the desired vector; in my hands, PCR assembly has worked every time I’ve tried it (~8times)).

Method

Remember, that this technique is good if: You want to assemble in series two long pieces of DNA from PCR product.

  • 1) Design the reverse primer for the DNA that will be 5′ w/ significant overlap w/ the forward primer for the 3′ piece. Essentially, as long as one of the primers has ~20bp overlap w/ the ‘reverse complement’ of the other primer, the products should anneal in the assembly reaction.
  • 2) Do PCR as normal for the two (5′ and the 3′) pieces using the longer primers that correspond to each piece.
  • 3) Check on a gel to make sure you got product from the first PCR reaction. Some people like to cut out the product band and use the purified products as template for the next reaction. I just use the PCR product straight from the first reactions w/o any purification; the logic is that the undesired primers/templates will be in such low concentrations that the intended reaction will be highly favored. Besides, if the residual “middle” primers did create product, they would just be making more starting template, which shouldn’t hurt your rxn.
  • 4) Set up the assembly reaction like a regular PCR, except: 1) as template use equal amounts of product from the first reactions, and 2)use the Forward primer for the 5′ piece and the Reverse primer for the 3′ piece to amplify the annealed template. (I use 45µl of Invitrogen Taq HIFI supermix, 2µl of 5µM primer each, and 0.5µl of each PCR product as template). Cycle like you did for the first reactions, except w/ longer extension time corresponding to the length of your product.
  • 5) Run the product on a gel. If the reaction worked, you should see a band the size of the sum of your two templates.
  • 6) Purify the product (I use the Quiagen PCR pur. kit), cut w/ desired endonucleases, and clone away! The quality of the product from this reaction is usually very good and very plentyful and I can get up to >100 transformants.
  • 7) An arguable disadvantage of this technique, besides slightly higher up-front cost for primers, is that it requires sequencing following assembly to make sure the PCR rxn hasn’t produced mutations. Use HiFi polymerase and you shouldn’t really have a problem, though… but don’t be lazy: you should still get your clones sequenced.
  • Also: If you already have one piece that you’ve cloned successfully and you want to cut out and assemble in series w/ the second piece (a PCR product), I still think it’s it’s easier just to do the PCR for the piece you already have cloned. For me, the assembly reaction product is well worth the cost of the extra primers (<$20) and PCR step.

Bacterial cell culture-PDF

Materials

  • Glass culture tubes with metal caps and labels
  • Growth medium, from media room or customized
  • Glass pipette tubes
  • Parafilm

Equipment

  • Vortexer
  • Fireboy or Bunsen burner
  • Motorized pipette
  • Micropipettes and sterile tips

Procedure

For a typical liquid culture, use 5 ml of appropriate medium. The amount in each tube does not have to be exact if you are just trying to culture cells for their precious DNA.

  1. Streak an agar plate from glycerol stock. Incubate plates until colonies grow.
    • Most incubations with E. coli take place at 37°C. Often bacteria with temperature sensitive mutations need to be grown at 30° instead.
    • The reason you need to streak plates is to be certain that you are starting from a single clonal population of cells. In this case, colonies that are picked are assumed to arise from a single cell dividing to form the colony.
    • Agar plates are just the standard. There are many different plating media that can be used (i.e., blood agar).
  2. Take your plates from the warm room. Take an aliquot of the antibiotic(s), if needed, from the freezer, and set it on the bench to thaw.
  3. Flame a glass pipette, open the bottle of medium and flame the mouth, measure out the amount you need to fill your tubes, flame the cap and recap the bottle as quickly as possible.
  4. Remove the tube cap, flame the top of the culture tube, pipette in 5 ml, flame the top of the tube, and cap it.
  5. Pick up one colony by tapping a small (0.1 μl) pipette tip (held on a pipette) on the surface of the plate. Uncap a tube, flame the top, tip the tube so as to transfer cells from the pipette tip to the surface of the media without touching the inside of the tube with the non-sterile portion of the pipetter, flame, cap. You can also use a sterile toothpick for transfer.
    • Often people use just a sterile metal loop (sterile by flaming) to place the colony in the tube. This is because flaming assures the sterility of the loop, whereas disposables such as pipette tips and toothpicks can be contaminated, and cannot be flamed on the spot.
  6. Pipette the desired amount of antibiotic into each tube along the wall. Do not put the non-sterile part of the pipette inside the tube and use a new tip for each tube.
  7. Vortex each tube for 1-2 seconds to mix well.
  8. Take the tubes to incubate. Turn the rotating rack off using the dial to decrease the speed. Do not use the switch because the stop will be too abrupt. Add your tubes in a balanced layout. If you have an odd number, use extra empty tubes for balance. Turn the rotation back on to 7 (applies to MIT building 68 5th floor warm room). Do not forget to turn the rack back on.
    • Incubation once again is often at 37°C in an incubator or warm room.
  9. Wait overnight or until your cells have reached the desired concentration.
    • The amount of time you wait depends on the reason for growing the cells. To miniprep plasmid DNA, an overnight culture is sufficient. However, when doing measurements of protein levels, take care to take readings at the same cell culture density each time.

Free Sulfhydryl Determination-PDF

Background

This is the protocol I used to determine the concentration of reduced cysteine in a purified protein. It takes advantage of the redox potential of the sulfhydryl group and a colorimetric reagent that turns yellow upon reaction with the sulfhydryl (DTNB + SH —> 2-nitro-5-thiobenzoic acid (yellow)). A standard curve is generated using a reactive sulfhydryl compound of known concentrations (cysteine, DTT, 2-ME, etc.) and then the amount of free cysteine determined for a solution of protein is compared to the known protein concentration. In doing so, one can determine the stoichiometry of cysteine to cystine in a protein.

Reagents

  • DTNB Solution 20x
    • 50 mM NaAc
    • 2mM DTNB
  • Tris Buffer Solution 10x
    • 1M Tris pH 8.0
  • Thiol Standard
    • 100 mM DTT
  • Protein of Interest
    • Usually several proteins samples are compared: a stock solution, a reduced and buffer exchanged sample, a reduced sample that was reacted with a thiol-blocking compound (like iodoacetate)and buffer exchanged. Make sure to remove free thiol or thiol-reactive compounds from the protein solution before attempting to measure free cysteine concentration.

Protocol

  1. Prepare a “Working Solution” by mixing:
    • 8.4 mLs Water
    • 1 mL 1M Tris-Cl pH 8.0
    • 0.5 mL DTNB solution
  2. Make serial dilutions of DTT (or whatever control you are using)with the highest concentration about 5 mM (or 10 mM for single thiol compound).
  3. Aliquot Working Solution into tubes (495 μL is usually fine).
  4. Add 5 μL of the DTT solutions to each and mix.
  5. Measure the absorbance of the solution at 412 nm (blank against a no DTT mixture). If you have trouble with reproducibility of the same sample, try placing the cuvette with the solution in the spec., then blanking, and without removing the cuvette, adding the thiol, mixing and measuring.
  6. Multiply the measured 412 absorbance by 100 (you made a 1/100 dilution in the reaction).
  7. Divide the result by 2 if your compound had 2 reactive groups (like DTT).
  8. Divide the result by 13,600 (the extinction coefficient of the yellow guy at 412 nm)
    1. This is the molarity of the yellow reagent that arose from a reaction with the free thiols in the solution you tested. You can plot this against the concentration of DTT you thought you used to make sure the values are close.
  9. In my hands, ther reaction is linear thoughout the linear range of the spec. (~0.01-1.0).

96 well Plate Assay Protocol

  1. Prepare a “Working Solution” by mixing:
    • 8.4 mLs Water
    • 1 mL 1M Tris-Cl pH 8.0
    • 0.5 mL DTNB solution
  2. Add 99 μL working solution into plate for each
  3. Add 1 μL of sample to each and mix
  4. Allow the reaction to take place for 5 minutes
  5. Measure 412 absorbance

Nuclear Extract Preparation-PDF

Abstract

Nuclear extract preparation is a useful procedure to enrich nuclear proteins for various techniques including EMSA and ChIP studies. There are two separate protocols below;
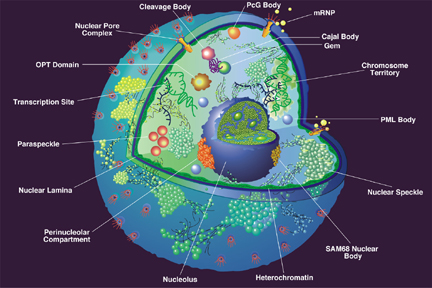
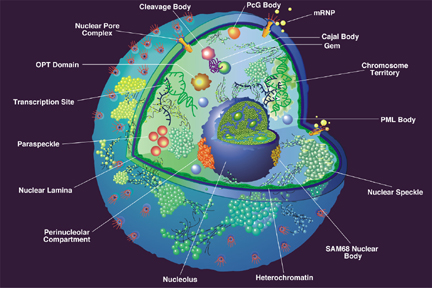
The nucleus of a eukaryotic cell

Hattori et al nuclear extract preparation

Reagents I

I. Homogenization buffer:

0.3M sucrose 10mM HEPES pH 7.6, 0.1M EDTA 0.1M EGTA 10mM KCl 1mM DTT 0.5mM PMSF in ethanol 0.74mM spermidine 15mM spermine 2mg/ml of each: aprotinin lupeptin bestatin

II. Cushion buffer: (same as homogenization buffer except 2.2M sucrose)

III. Lysis buffer:

10% glycerol 10mM HEPES, pH 7.6 0.1M EDTA 3mM MgCl2 100mM KCl 1mM DTT 0.1mM PMSF in ethanol 0.74mM spermidine 15mM spermine 2mg/ml of each: aprotinin lupeptin bestatin

IV. Dialysis buffer:

20% glycerol 20mM HEPES, pH 7.6 0.2M EDTA 1mM NaMoO4 100mM KCl 2mM DTT 0.1mM PMSF in ethanol 0.74mM spermidine 15mM spermine 2mg/ml of each: aprotinin lupeptin bestatin

4M ammonium sulfate 528g of the salt/l, equal to 75% (saturated) ammonium sulfate

500mM PMSF, 1,000x 870mg of the powder per 10ml of ethanol

Procedure I

I. Homogenize cells or tissue 1. Wash commercially available HeLa cells (30g) or minced in 3mm pieces fresh liver(15-20g) from staining with homogenizing buffer (10ml) and transfer it to 100ml beaker 2. Add to the beaker another 25ml of the buffer and split the content in half (2x15ml) 3. Homogenize each portion twice, 10 strokes (“up” and “down”) each with a teflon pestle. Between strokes, cool homogenizer on ice. Try to maintain temperature close to +4C

II. Pellet the nuclei 1. Filter homogenate through the four- layer cloth (25-30ml) and mix homogenate with cushion buffer (50ml of cushion buffer per 25ml of the homogenate 2. Distribute to ultracentrifuge tubes cushion buffer (10 ml of buffer per a tube). Carefully load cushion buffer- homogenate mix on the top (total volume is about 38 ml). 3 Equilibrate tubes at the balance and centrifuge them in SW28 rotor (24,000 rpm or 76220g, 50min, 1C) or 60Ti rotor (same time and temperature at 32,750 rpm/min)

III. Lyse nuclei 1. Invert tubes and keep them on ice for 10min 2. Resuspend pellets in nuclear lysis buffer (5ml/pellet). Perform one stroke with Dounce homogenizer 3 Add lysis buffer to 40ml and 2ml of 4M ammonium sulfate and agitate for 30-60min at +4C

IV. Reprecipitate nuclear proteins 1. Centrifuge lysates in 55.2Ti rotor (35,000rpm, 60min, +1C) or 60Ti rotor (37,700rpm, 60min, +1C). Save super. 2. Add ammonium sulfate (330mg/ml of solid salt or 65ml of 4M solution) and keep sample(s) on ice for 15min 3 Centrifuge sample(s) in 55.2Ti rotor or 60Ti rotor for 20min at the same speed and temperature. Save THE PELLET(S).

V. Dialyze nuclear extract and measure protein 1. Resuspend each pellet in 500ml of dialysis buffer and dialize sample(s) against dialysis buffer (1:1,000 for 4h) 2 Clarify nuclear extract by centrifugation (+4C, 10min) in microfuge. 3. Measure protein and aliquot supernatant (100-500mg/tube) and store it at -70C

References I

  1. Hattori M, Tugores A, Veloz L, Karin M, and Brenner DA. A simplified method for the preparation of transcriptionally active liver nuclear extracts. DNA Cell Biol. 1990 Dec;9(10):777-81. DOI:10.1089/dna.1990.9.777 | PubMed ID:2264931 | HubMed [Paper1]

Dignam et al nuclear extract preparation

Reagents II

Buffers used for extract preparation are designated as follows:

Buffer A: 10 mM HEPES (pH 7.9 at 4oC), 1.5 mM MgCl2 , 10 mM KCL and 0.5 mM DTT

Buffer B: 0.3 HEPES (pH 7.9), 1.4 M KCL and 0.03 M MgCL2

Buffer C: 20 mM HEPES (pH 7.9), 25% (v/v) glycerol, 0.42 M NaCl, 1.5 mM MgCl2, 0.2 mM EDTA, 0.5 mM phenylmethylsulfonyl fluoride (PMSF) and 0.5 mM DTT

Buffer D: 20 mM HEPES (pH 7.9), 20% (v/v) glycerol, 0.1 M KCL, 0.2 mM EDTA, 0.5 mM PMSF, and 0.5 mM DTT. DTT and PMSF were added fresh to the buffers just before use.

Procedure II

Hela cells were grown in spinner flasks at 37oC in Joklik’s MEM containing 5% calf serum. They were frown to 4 to 6 x 10⁵ cells per ml prior to harvesting for extract preparation.

HeLa cells were harvested from cell culture media by centrifugation (at room temperature) for 10 min at 2000 rpm in a Sorvall HG4L rotor. Pelleted cells were then suspended in five volumes of 4oC phosphate buffered saline and collected by centrifugation as detailed above; subsequent steps were performed at 4oC.

The cells were suspended in five packed cell pellet volumes of buffer A and allowed to stand for 10 min.

The cells were collected by centrifugation as before and suspended in two packed cell pellet volumes (volume prior to the initial wash with buffer A) of buffer A and lysed by 10 strokes of a Kontes all glass Dounce homogenizer (B type pestle).

The homogenate was checked microscopically for cell lysis and centrifuged for 10 min at 2000 rpm in a Sorvall HG4L rotor to pellet nuclei.

The supernatant was carefully decanted, mixed with 0.11 volumes of buffer B, and centrifuged for 60 min at 100,000 gav (Beckman Type 42 rotor). The high speed supernatant from this step was dialyzed five to eight hours against 20 volumes of buffer D and is designated the S100 fraction.

The nuclear extract was prepared as follows. The pellet obtained from the low speed centrifugation of the homogenate was subjected to a second centrifugation for 20 min at 25,000 gav (Sorvall SS34 rotor), to remove residual cytoplasmic material and this pellet was designated as crude nuclei.

These crude nuclei were resuspended in 3 ml of buffer C per 109 cells with a Kontes all glass Dounce homogenizer (10 strokes with a type B pestle). The resulting suspension was stirred gently with a magnetic stirring bar for 30 min and then centrifuged for 30 min at 25,000 gav (Sorvall SS34 rotor).

The resulting clear supernatant was dialyzed against 50 volumes of buffer D for five hours. The dialysate was centrifuged at 25,000 gav (Sorvall SS34 rotor) for 20 min and the resulting precipitate discarded.

The supernatant, designated the nuclear extract, was frozen as aliquots in liquid nitrogen and stored at -80oC.

The protein concentration was usually 6-8 mg/ml and 15-20 mg of protein were obtained from 109 cells.

Reference

  1. Dignam JD, Lebovitz RM, and Roeder RG. Accurate transcription initiation by RNA polymerase II in a soluble extract from isolated mammalian nuclei. Nucleic Acids Res. 1983 Mar 11;11(5):1475-89. DOI:10.1093/nar/11.5.1475 | PubMed ID:6828386 | HubMed [Paper1]

Feruloyl Esterase Protocols-PDF

Introduction

These are methods to screen for and assay Ferulic-acid Esterase activity.

Plate Screen

Materials

  • Ethyl ferulate solution (100mg/ml in dimethylformamide).
  • Agar plates of media appropriate to your microorganism.
    • If screening natural strains some find it helpful to eliminate glucose from the media to drive FAE secretion.
    • This means that you will have to make this media yourself and can’t buy a premix.
  • Water
  • Agar or Agarose (agarose is preferred)

Method

1. Grow colonies on agar plates of appropriate media until colonies reach a decent size.
2. For each plate to be screened, add 25-30mg agar to 6ml of water (i.e. if your screening 3 plates thats 80mg agar to 18ml water).
3. Microwave the agar mix until the agar is melted and put in 60°C water bath.
4. Once the media has been in the water bath for 10 mins:

1. Add the 20μL of ethyl ferulate solution for every ml of top agar (120μL per plate), and swirl lightly to disperse.

  • You want the ethyl ferulate to look cloudy in the agar so don’t swirl too hard.
  • Bubbles = Enemy
2. Pour onto grown colonies immediately.

5. Incubate for ~4 hours.
6. If a clear halo forms around the colony in the top agar then it’s positive for FAE!!!

Notes

  • Donaghy et al. (1998) added the ethyl ferulate solution directly to the media immediately before pouring the plates, and used a final concentration of 2mg/mL while Hassan and Pattat (2011) added it to the top agar at a stated concentration of 0.05mg/ml. We’ve found that the hassan and pattat concentration is way too low to make the agar cloudy but 1mg/ml can work well in a pinch. — Mike
  • Agarose instead of agar is better too for top agar.

Nitrophenyl Ferulic Acid Assay

Materials

  • Protein desalting columns
  • HEPES
  • sodium azide
  • Dnase
  • 4-nitrophenyl ferulic acid

Method

  1. Make Protein buffer
    1. 100mM hepes
    2. 10μg/mL sodium Azide
    3. 5μL/mL Dnase
  2. Concentrate cellular proteins from 1mL culture into 100μL buffer
  3. Make Substrate buffer
    1. 2.5mM 4-nitrophenyl ferulic acid
    2. 0.5MKPO4
  4. Add 20μL protein to 80μL substrate
  5. Incubate for 30 mins at 37°C

Spectrophotometric Assay

This method quantifies the release of free ferulic-acid from ethyl-ferulate or methyl-ferulate. It is dependent on their absorbant divergence at 338nm.

Materials

  • 100mM sodium-phosphate buffer (pH = 6.5)
  • Ethyl-ferulate solution (10mg/mL in dimethyl-formamide)
  • Ferulic-acid solution (8.7mg/mL in dimethyl-formamide)
    • To be a molar equivalent to the EF solution.

Method

1. Aliquot 800 μL of sodium phosphate buffer into 1.5 mL centrifuge tubes

  • Three tubes for each culture to be assayed (label them)
  • For each culture there will be a positive (ethyl-ferulate, incubated), negative (ferulic-acid, incubated), and control (ethyl-ferulate, killed).
2. Centrifuge 1 mL of each culture to be assayed.
3. Add 200ul of the appropriate culture supernatant to the tubes containing 800 μL phosphate buffer.
4. Add 15μL of ethyl ferulate solution (10 mg/mL) to the positive and control tubes.
5. Add 15μL of ferulic acid solution (8.7 mg/mL) to the negative tube.
6. Put the control tube in the 99°C degree water bath for 3 minutes.
7. Put the positive and negative tubes in the 37°C water bath for 2 hours.
8. After two hours stop the reaction by 3 mins in 99 degree water bath.
9. Measure absorbance in UV cuvette at 338nm.

References

  • Donaghy, J., P. F. Kelly, et al. (1998). “Detection of ferulic acid esterase production by Bacillus spp. and lactobacilli.” Applied Microbiology and Biotechnology 50(2): 257-260.
  • Mastihuba, V., L. Kremnicky, et al. (2002). “A spectrophotometric assay for feruloyl esterases.” Analytical Biochemistry 309(1): 96-101.
  • Nsereko, V. L., B. K. Smiley, et al. (2008). “Influence of inoculating forage with lactic acid bacterial strains that produce ferulate esterase on ensilage and ruminal degradation of fiber.” Animal Feed Science and Technology 145(1-4): 122-135.
  • Ralet et al.,1994
  • Yue et al., 2009

Purification of His-tagged proteins/Denaturing with refolding-PDF

Overview

Denaturing purifications can often lead to better purity and yield. This purification refolds the protein on the column. Refolding on the column is supposedly preferable in many cases since the proteins are separated from one another.

Materials

Lysis and column equilibration buffer

  • 8 M urea
  • 100 mM NaH2PO4
  • 10 mM Tris Cl
  • 10 mM imidazole (recommended by Kathleen, 9/27/2006)
  • pH 8.0

Denaturing wash buffer (wash buffer 1)

  • 8 M urea
  • 100 mM NaH2PO4
  • 150 mM NaCl
  • 20 mM imidazole
  • pH 8.0

Native wash buffer (wash buffer 2)

  • 50 mM NaH2PO4
  • 500 mM NaCl
  • 20 mM imidazole
  • pH 8.0

Elution buffer

  • 50 mM NaH2PO4
  • 500 mM NaCl
  • 250 mM imidazole
  • pH 8.0

Notes

  • Solid urea to make up an 8M solution takes up a lot of volume so be conservative on how much H 2O you start with (maybe 50% of final volume)
  • Kathleen suggested supplementing the lysis buffer with 10mM imidazole to prevent nonspecific protein binding to the column.

Procedure

  1. Grow up an overnight 5mL culture in LB plus the appropriate antibiotic.
  2. The following morning, dilute back the culture 1:50 to the appropriate culture volume (which depends on the expected yield of the protein).
    • Since I don’t know what yield to expect, I arbitrarily did 50mL cultures assuming that my protein yield would be low and let it grow most of the day. I try to catch the cultures around OD600nm 0.6.
  3. Verify pH of lysis and denaturing wash buffers. Adjust if necessary.
    • Dissociation of urea can lead to changes in pH. The pH definitely needs to be checked prior to using the solutions.
  4. Harvest the cells by centrifugation at 4000 x g for 15 mins.
    • The Qiagen protocol didn’t specify a temperature so I did 4°C.
  5. Decant supernatant.
  6. The cell pellet can be stored at -70°C or processed immediately.
    • I typically store the pellet at -80°C.
  7. Thaw for 30 mins on ice.
    • The Qiagen protocol calls for 15 mins, but it was still frozen after 15 mins so I let it thaw for 30 mins.
  8. Transferred to 2mL eppendorf tube.
  9. Resuspend in 1mL lysis buffer (see above).
  10. Incubate cells with agitation for 1 hr at room temperature.
    • Use an orbis shaker on the bench to do this temp (usually kept in 37° incubator). Note that the shaker moves during shaking.
  11. Centrifuge lysate at 10000 x g for 30 mins at room temperature.
  12. Add 600 μL lysis buffer to Ni-NTA column to equilibrate.
  13. Centrifuge Ni-NTA column 2 mins at 700 x g with open lid to remove equilibration buffer.
  14. Save 20 μL cleared lysate.
  15. Load 600 μL cleared lysate to Ni-NTA column.
  16. Centrifuge Ni-NTA column 5 mins at 700 x g with closed lid.
    • I typically reload with the rest of my cleared lysate.
    • Save flow through.
  17. Add 600 μL denaturing wash buffer 1 to Ni-NTA column.
  18. Centrifuge Ni-NTA column 2 mins at 700 x g with open lid.
    • Save flow through.
  19. Add 600 μL native wash buffer 2 to Ni-NTA column.
  20. Centrifuge Ni-NTA column 2 mins at 700 x g with open lid.
    • Save flow through.
  21. Tranfer to clean 1.5mL eppendorf tube.
  22. Add 200μL elution buffer.
  23. Centrifuge Ni-NTA column 2 mins at 700 x g with open lid.
    • Most of the protein should elute in this elution step.

Notes

  • Sauer lab uses a Qiagen Ni-NTA resin but this protocol uses spin columns. (Smaller scale purification).
  • Using the Qiagen Ni-NTA resin may be preferable for proteins with low yields.
  • Contaminating proteins tend to be less of an issue in bacteria because there are few proteins with neighboring histidines that tend to bind to the column.
  • 20 year old spin columns don’t work.  🙂
  • Even when doing denaturing purifications, add 10mM imidazole to solutions to help with washing out non His tagged proteins.

Safety

References

  1. Sauer:Purification of His-tagged proteins/Denaturing prep[SauerDenaturingProtocol]
  2. Qiagen Ni NTA Spin Kit manual[QiagenNTAManual]

NuPAGE electrophoresis/Fast staining-PDF

Overview

A fast protocol for visualizing bands on a polyacrylamide gel via coomassie-like staining.

Materials

  • Deionized water
  • Invitrogen SimplyBlue SafeStain
  • Microwave
  • Plastic tray
    • Use the lid of a 1000μL pipette tip box.
  • Orbital shaker
  • Kimwipes

Procedure

  1. Add 100mL deionized water to the staining tray.
  2. Microwave staining tray loosely covered for 30 secs on high.
  3. Shake the staining tray for 1 min on an orbital shaker at room temperature.
  4. Discard water.
  5. Repeat steps 1-4 two more times.
  6. Add 20mL SimplyBlue SafeStain (enough to just cover the gel).
  7. Microwave staining tray loosely covered for 20 secs on high.
    • 1 min seemed a bit too long.
  8. Shake staining tray for 5 mins on orbital shaker at room temperature.
  9. Discard SimplyBlue SafeStain.
  10. Add 100mL deionized water.
  11. Add a kimwipe.
  12. Shake staining tray for 10 mins on orbital shaker at room temperature.
  13. Add 20mL 20% NaCl for at least 5 mins.
    • Only do this step if you aren’t planning on drying the gel! Otherwise, when the gel dries, you will see a white salt precipitate.
  14. Gel can be stored in salt solution for several weeks.

Notes

  • This protocol seems to work pretty well but is not as sensitive as the Knight:NuPAGE electrophoresis/Slow staining approach.
  • To date, the best staining tray I’ve found is the lid of a 1000μL pipette tip box. Then use a piece of mesh that just fits inside the lide to either keep the gel in place while changing solutions or to move the gel to and from the light box. This method requires smaller volumes of stain than the staining tray from Invitrogen.