Overview
If you notice when using the Plasma Preen that you get plasma but it seems “locked” (i.e. you see a pink-purple glow but it is not moving) the problem could be that the antenna (fan at the top of the chamber) is no longer turning.
The fan may have stopped turning because the O-ring that is used to turn it has worn down and snapped. This protocol will explain how to take the Plasma Preen apart and replace the O-ring.
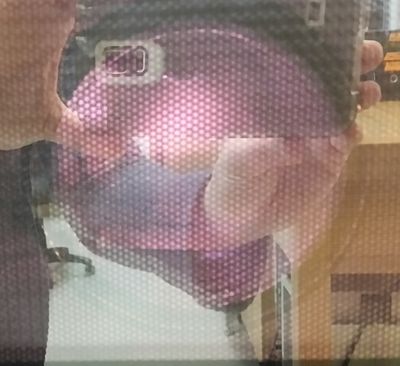 If you have pretty pink-purple plasma but it isn’t moving your antenna might not be rotating. “Locked” plasma won’t give you a good bond between PDMS and glass. Apologies for the reflection in the microwave door.
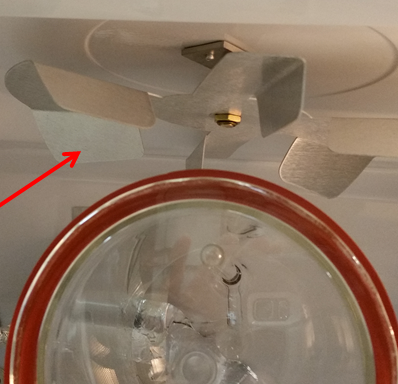 If the plasma is locked, it might be because this whirligig is not spinning.
Materials
You will need the following to change the brushes in the lab roller drums:
- New O-Ring (#263 O-Ring)
- Philips head screwdriver
- Small flathead screwdriver
- Pliers or wrench
- Super glue
- Razor blade
Protocol
- TURN OFF THE PLASMA PREEN AND UNPLUG EVERYTHING.
- You are only going to be dealing with the “microwave” part of the plasma preen, so unhook the tubing at the body of the microwave (see picture). These should only be finger-tight, so you should not need a wrench.
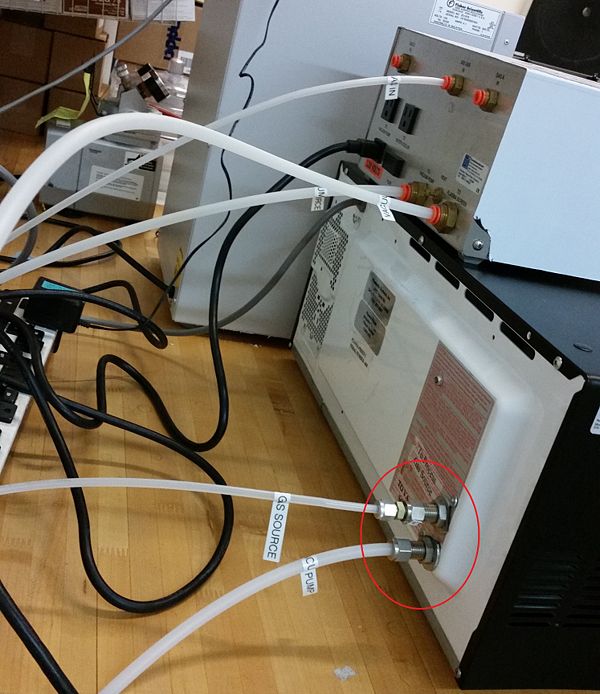 Remove the tubes connected to the microwave body.
- Remove the glass bell jar from inside of the Plasma Preen (don’t forget this costs >$800 to replace, so put it in an uber-safe spot). Once the bell jar is safe, maneuver the Plasma Preen to a clear workspace where you have plenty of room to get on all sides of it.
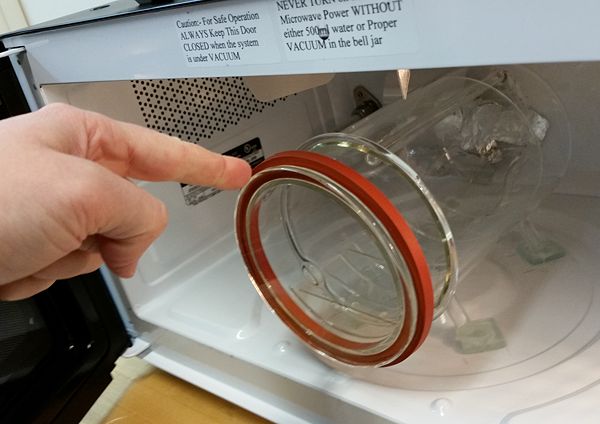 Slide the bell jar out carefully and put it in a safe location. Perhaps a giant box full of feathers. Really. Put it somewhere away from where you are working with padding so it won’t get broken!
- Remove the black case of the microwave
- You will need to remove the handle to the analog power regulator (see picture). This can be done using a small flathead screwdriver and loosening the two screws. Then use the pliers or the appropriate wrench to remove the nut holding the potentiometer to the case.
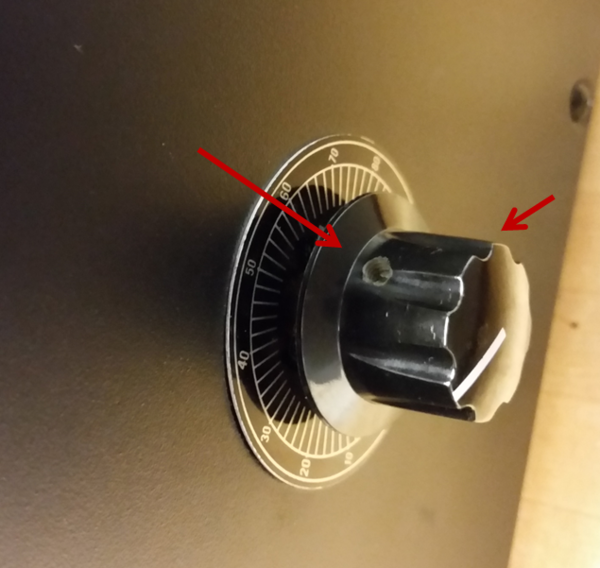 The red arrows label the screws holding on the knob. One screw is hiding about a quarter turn from the one visible in the picture.
-
- Remove the screws holding the case on. There are 5 screws on the back of the unit and one per each side (7 total, 5 silver, 2 black). There are 4 plastic brackets on top of the microwave that need to be removed. Place the screws and brackets in a beaker, or similar, so that you don’t lose them.
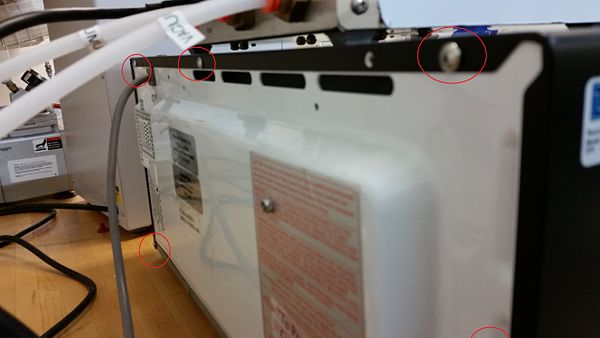 There are 5 screws on the back. One is hiding in the bottom corner. There are two screws on the sides. One is visible in the picture of the analog power regulator above.
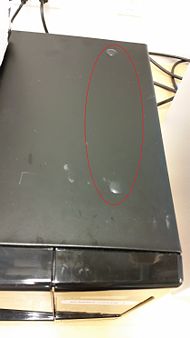 There are four brackets on the top. Here are two of them. They pop in and out.
-
- Slide the case back and off. NOTE: The analog power regulator is a pain to deal with. You can gently push its shaft through the case to get the case off.
- Check the O-ring. The O-ring is quite obvious and is right at the top of the machine. Check if it is broken or off of its pulleys. If broken, remove the broken pieces and throw them away.
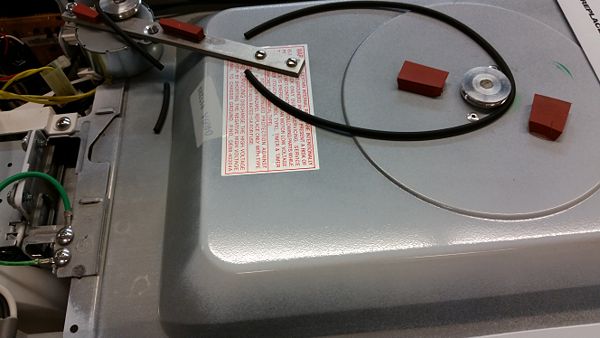 In this case, as soon as the cover was removed it became obvious that the O-ring was broken.
- Replace the pulley.
- Take a #263 O-ring and cut it with a razor blade.
- Wrap it around the pulleys and determine how long it needs to be. Note that it doesn’t have to be particularly tight as the antenna moves very easily. Cut the pulley with the razor blade so that when the ends are held together it is the right size.
- Glue the two ends of the O-ring together with super glue. Allow to dry.
- Place the O-ring around the pulleys.
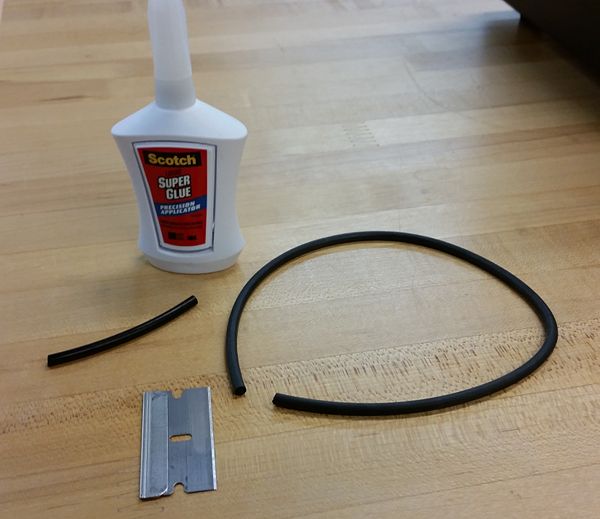 O-ring arts and crafts. Cut to the desired length. Glue back together. Put over pulleys. Done.
- Reassemble the plasma preen.
- Start by maneuvering the potentiometer into position (get the shaft through the case). Secure it with the nut. Note that it is easiest to make sure it is in the fully off position, that way you know how to put the knob back on such that the white indicator line points at approximately the correct place (power range 0-100%).
- Slide the case into place. There are brackets on the top and both sides. These will click into place. If the case isn’t fitting smoothly it is most likely because these are not appropriately aligned. Don’t force it. Just back up and try again taking careful note of where the brackets on the case are and how they should align with the body. Seriously don’t force it. It will happily slide into place if you line everything up correctly.
- Reattach the tubing from the vacuum and the gas source to the back of the microwave.
- Replace the bell jar.
Helpful Links
Notes
Please feel free to post comments, questions, or improvements to this protocol. Happy to have your input!
- List troubleshooting tips here.
- You can also link to FAQs/tips provided by other sources such as the manufacturer or other websites.
- Anecdotal observations that might be of use to others can also be posted here.


